AccountSight is one of the most efficient and user friendly time tracking software. Users can easily record time and attendance by filling up online timesheets in AccountSight without any hassle. They can flawlessly track time and manage the weekly time sheet by updating it, submitting on time and having manager’s approval.
For users to be able to enter time and submit timesheets for a project, they must be already assigned to that particular project by Admin. Once Admin has configured the settings, the assigned users can login to their accounts and submit their respective timesheets.
Follow the steps below for Manual Time Entry:
1] Navigate to time entry Link: https://yourcompany.accountsight.com
Username: youremail@yourcompany.com (Your registered email)
Password: xxxxxxxx (as per account setup email)
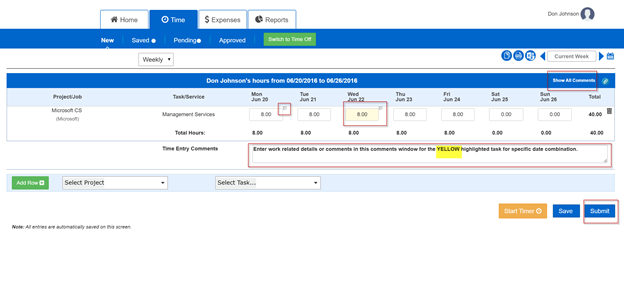
2] To enter your timesheet, please navigate to the ‘Time’ tab and select time entry week for entry using arrows, current week or week from calendar.Select Project and Task and click on ‘Add Row’ button and start entering time as you see in the screenshot in step 3.
3] Timesheet is auto-save enabled i.e. when you tab through to the next the time entry window after entry of previous day, hours are automatically saved. There is no additional saving required. If you have multiple timesheets saved, you can access them all under ‘Saved’ Tab. You can enter comments for a specific task/date in the comments section. All the commented dates have a small notes icon on the top right. Show all comments shows all the comments entered so far on the timesheet.
Any number of project and task combination rows can be added to the timesheet
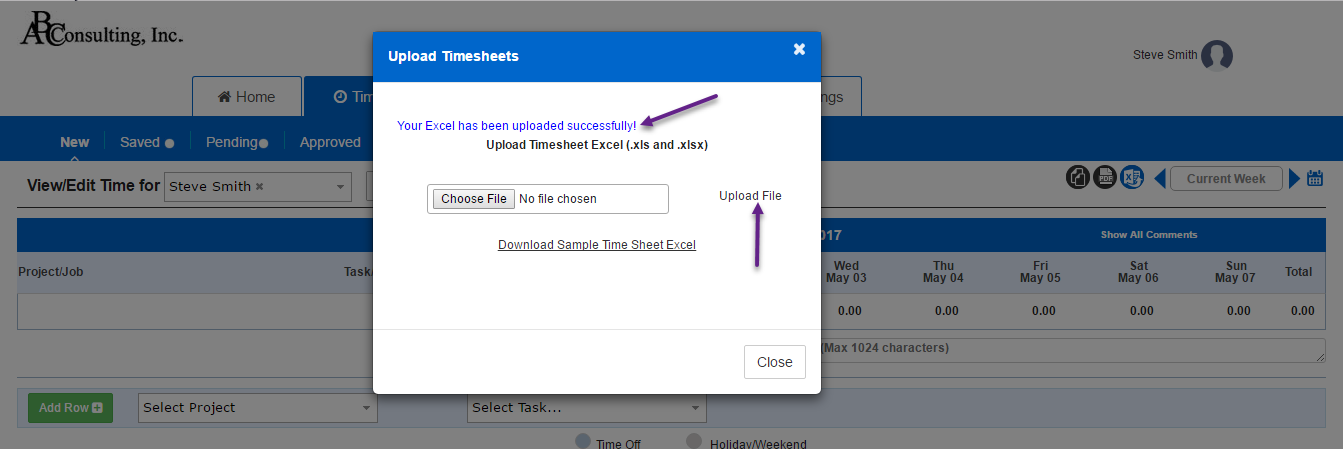
You may also enter the time-sheet via excel upload. You will need to click on the Excel icon under the Time Tab.
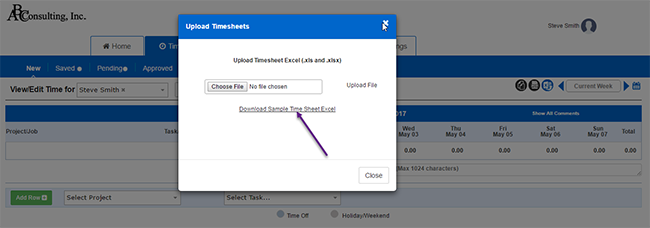
a) Download a sample template and update as per instructions and save on your computer.
b) Choose the updated file on the screen.
c) Upload the excel.
4] Please click on Submit button after completing the timesheet. Submitted timesheets are routed to the Approver(s). You can see the status of your pending timesheet by clicking on the total hours in the summary sections. Popup will show you who will approve your timesheets.
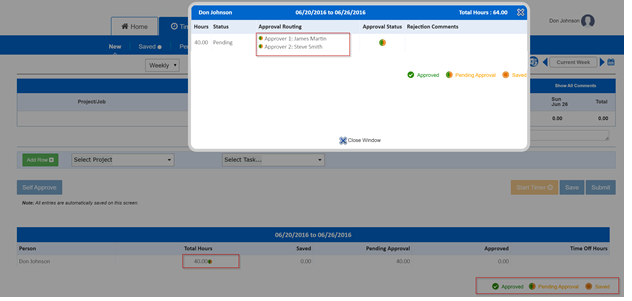
5] Pending timesheets can be viewed under ‘Pending approval’ until approved.
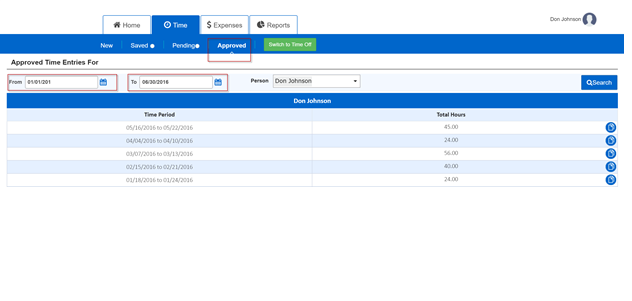
After approval, you can see the timesheets under the ‘Approved’ tab.
Rejected timesheets are moved to the ‘Saved’ tab and highlighted in red color.
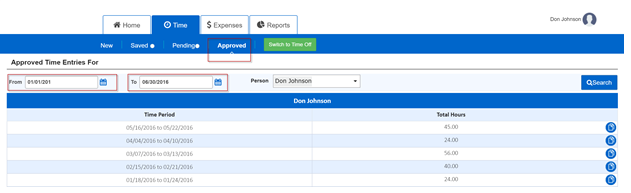
Approved timesheets can be filtered using date range.